Installation
Requirement
Before installing our CMS, ensure that your server meets the following requirements:
- Apache, nginx, or another compatible web server
- PHP >= 8.1 or higher
- Minimum MySql version: 5.7
MySQLDatabase serverPDOPHP extensionOpenSSLPHP extensionmbstringPHP extensionexifPHP extensionfileinfoPHP extensionxmlPHP extensionCtypePHP extensionJSONPHP extensionTokenizerPHP extensioncURLPHP extension- Ensure the
mod_rewriteApache module is enabled
PHP Configuration
Open your php configuration file php.ini and change the following settings.
memory_limit = 128M
max_execution_time = 300
Database Create
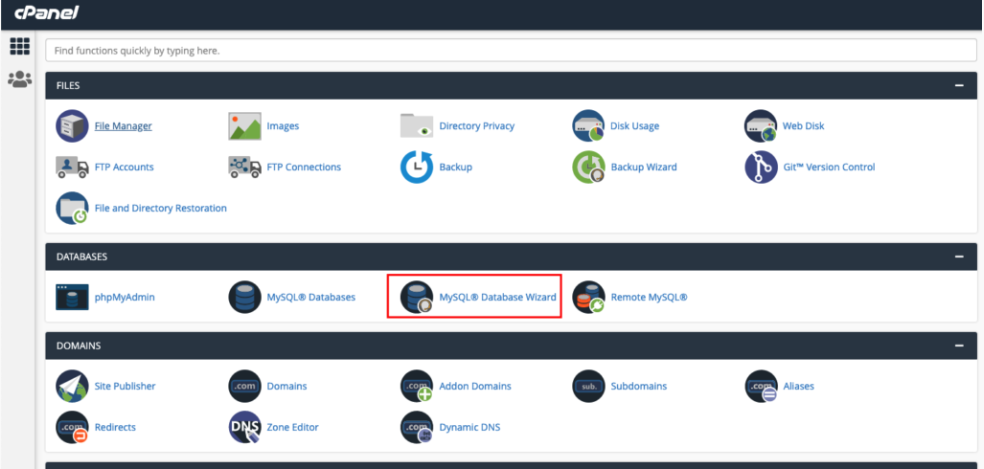
Step 01
Now login to you cPanel and go to > MySQL® Database Wizard
Step 02
Create Database
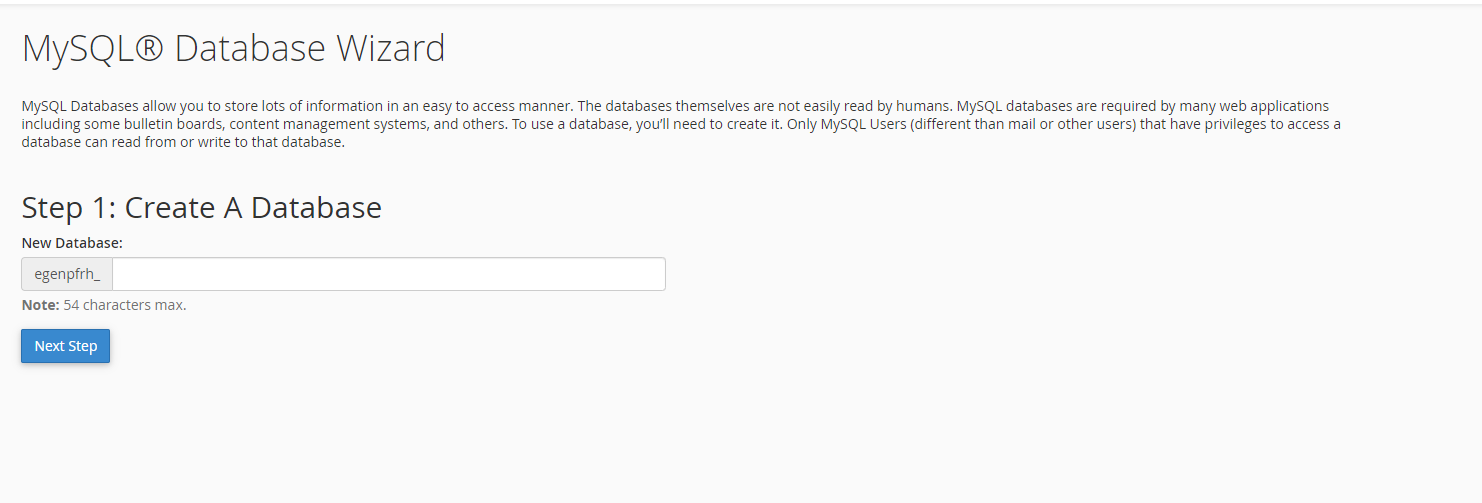
Step 03
Create Database Users, do not forget to keep your database user password, we will need this while we run installation wizard.
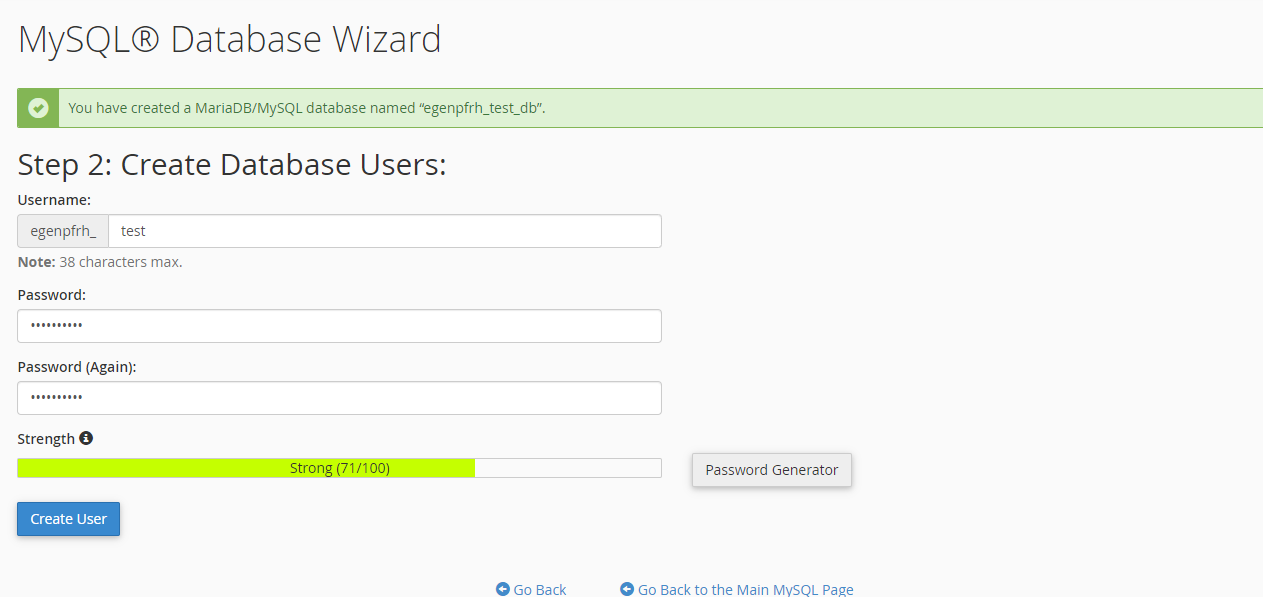
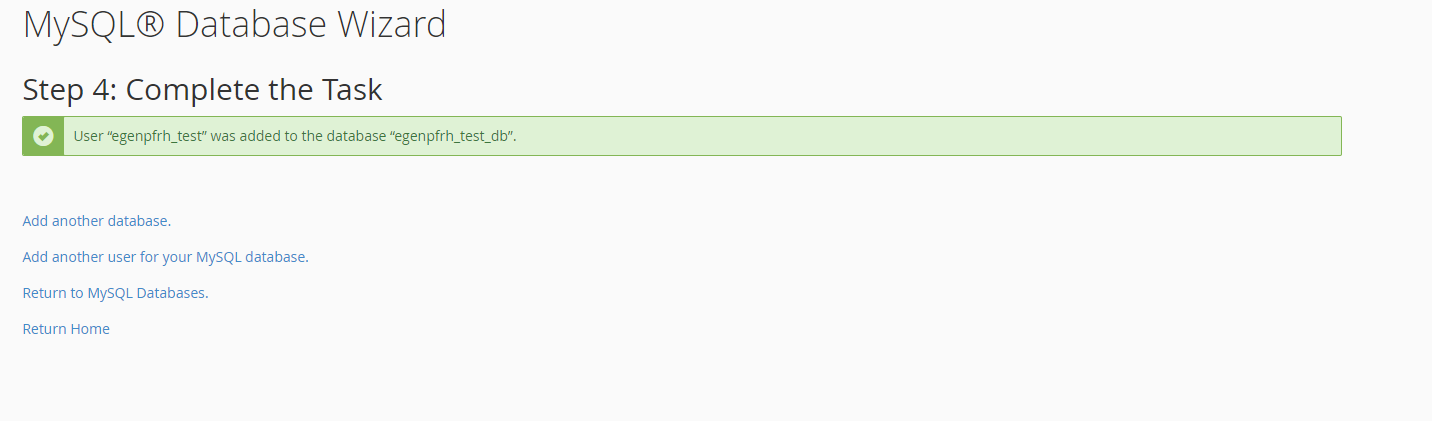
Step 04
Create Database Users, do not forget to keep your database user password, we will need this while we run installation wizard.
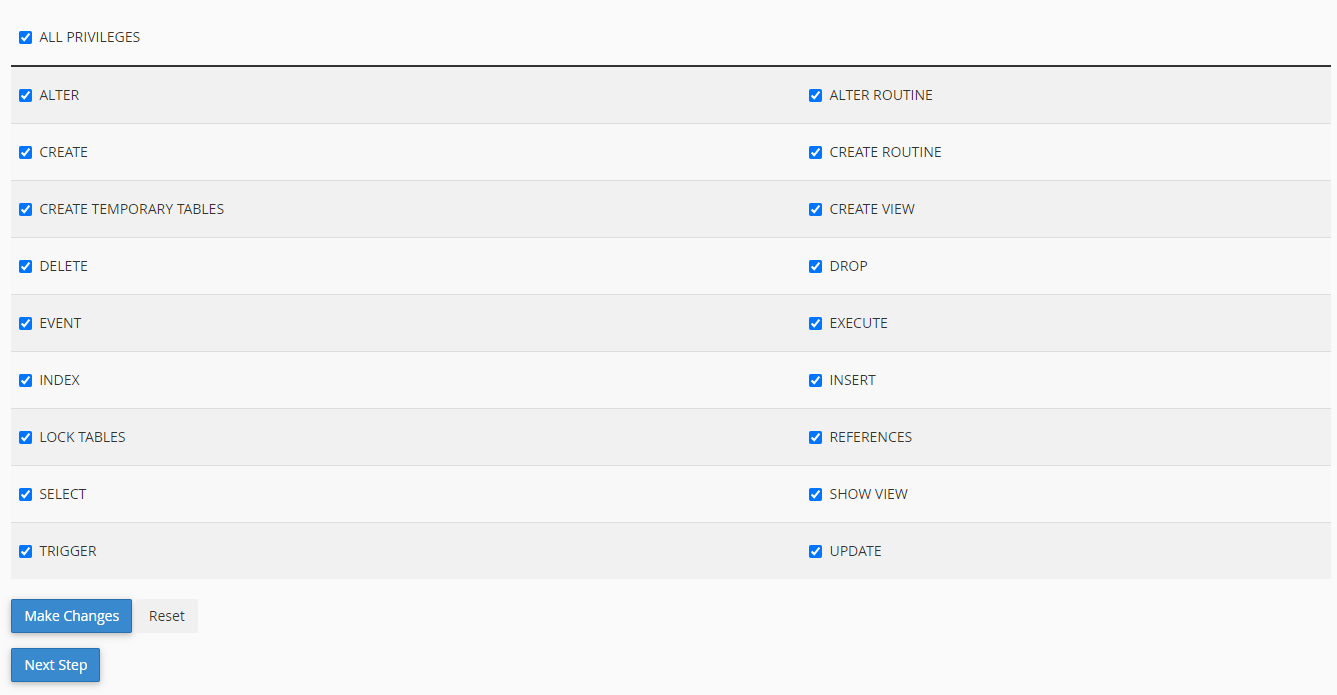
Step 05
Add user to the database. Check all privileges and click make changes. Then click “Next Step”
Step 06
Database create is done, keep database user, database name, database password in a note.
Upload Application
Step 01
Now upload file, Your selected folder
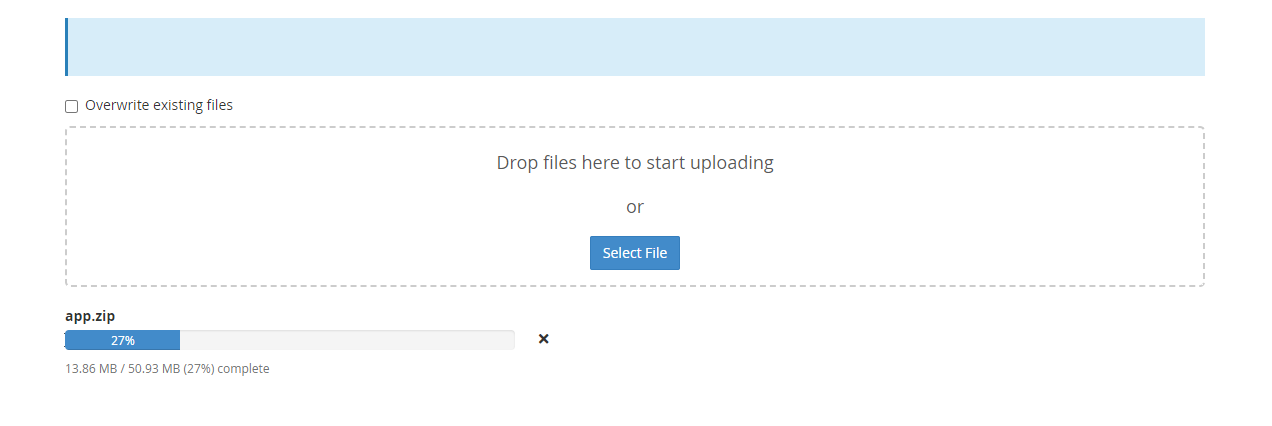
Step 02
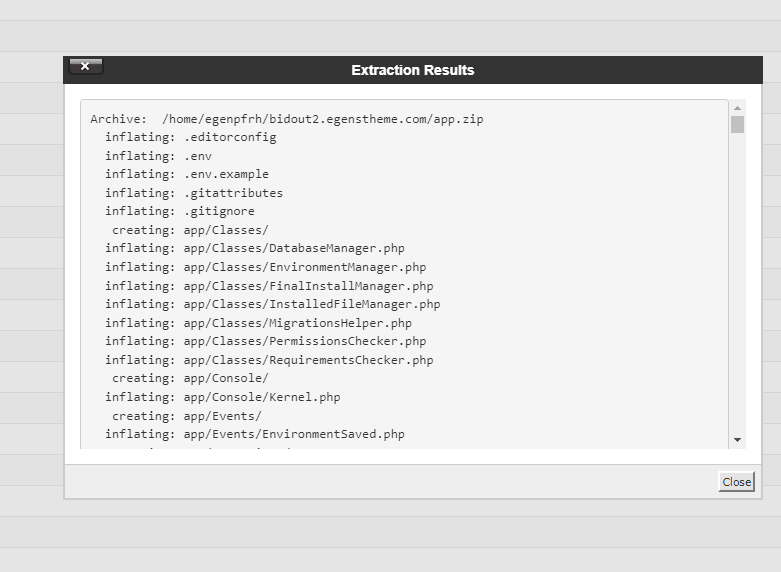
Extract zip file in server
Folder Permission
Step 01
Then Go to file. And Change Fill Permission

got to bootstap directory then change permission to cache
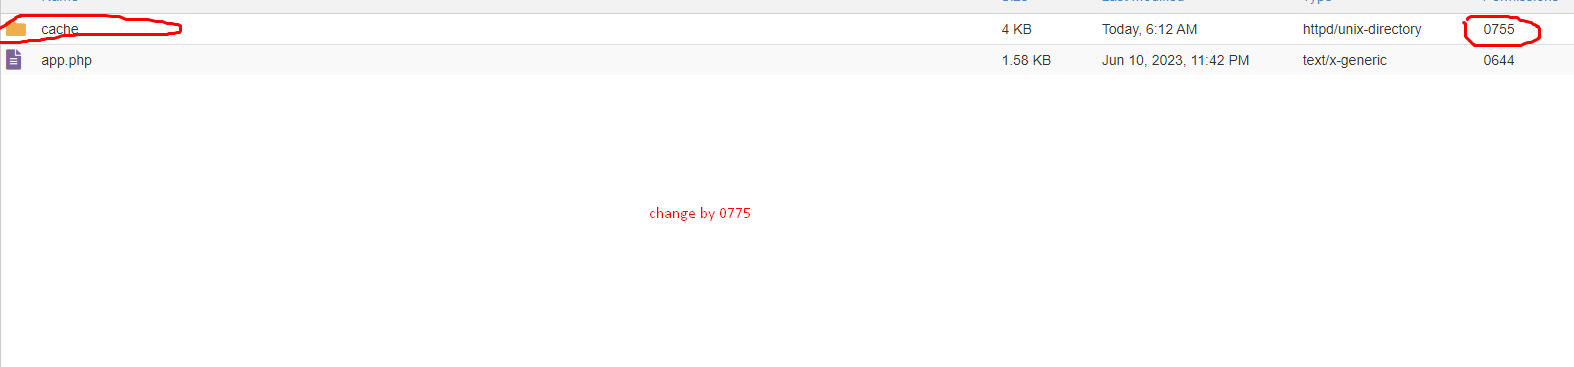
Then Go to file. And Change Fill Permission

Then Go to file. And Change Fill Permission

Install Application
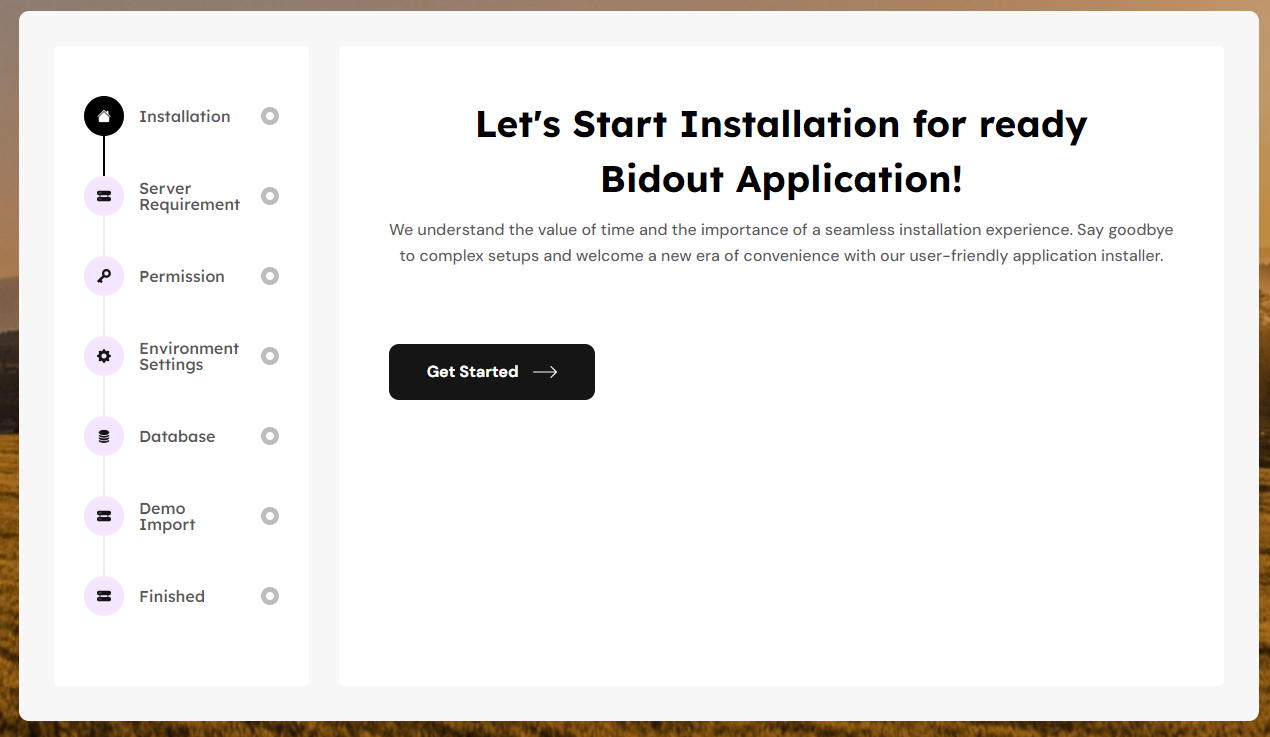
001
Let's Start Installation for ready BidOut Application.
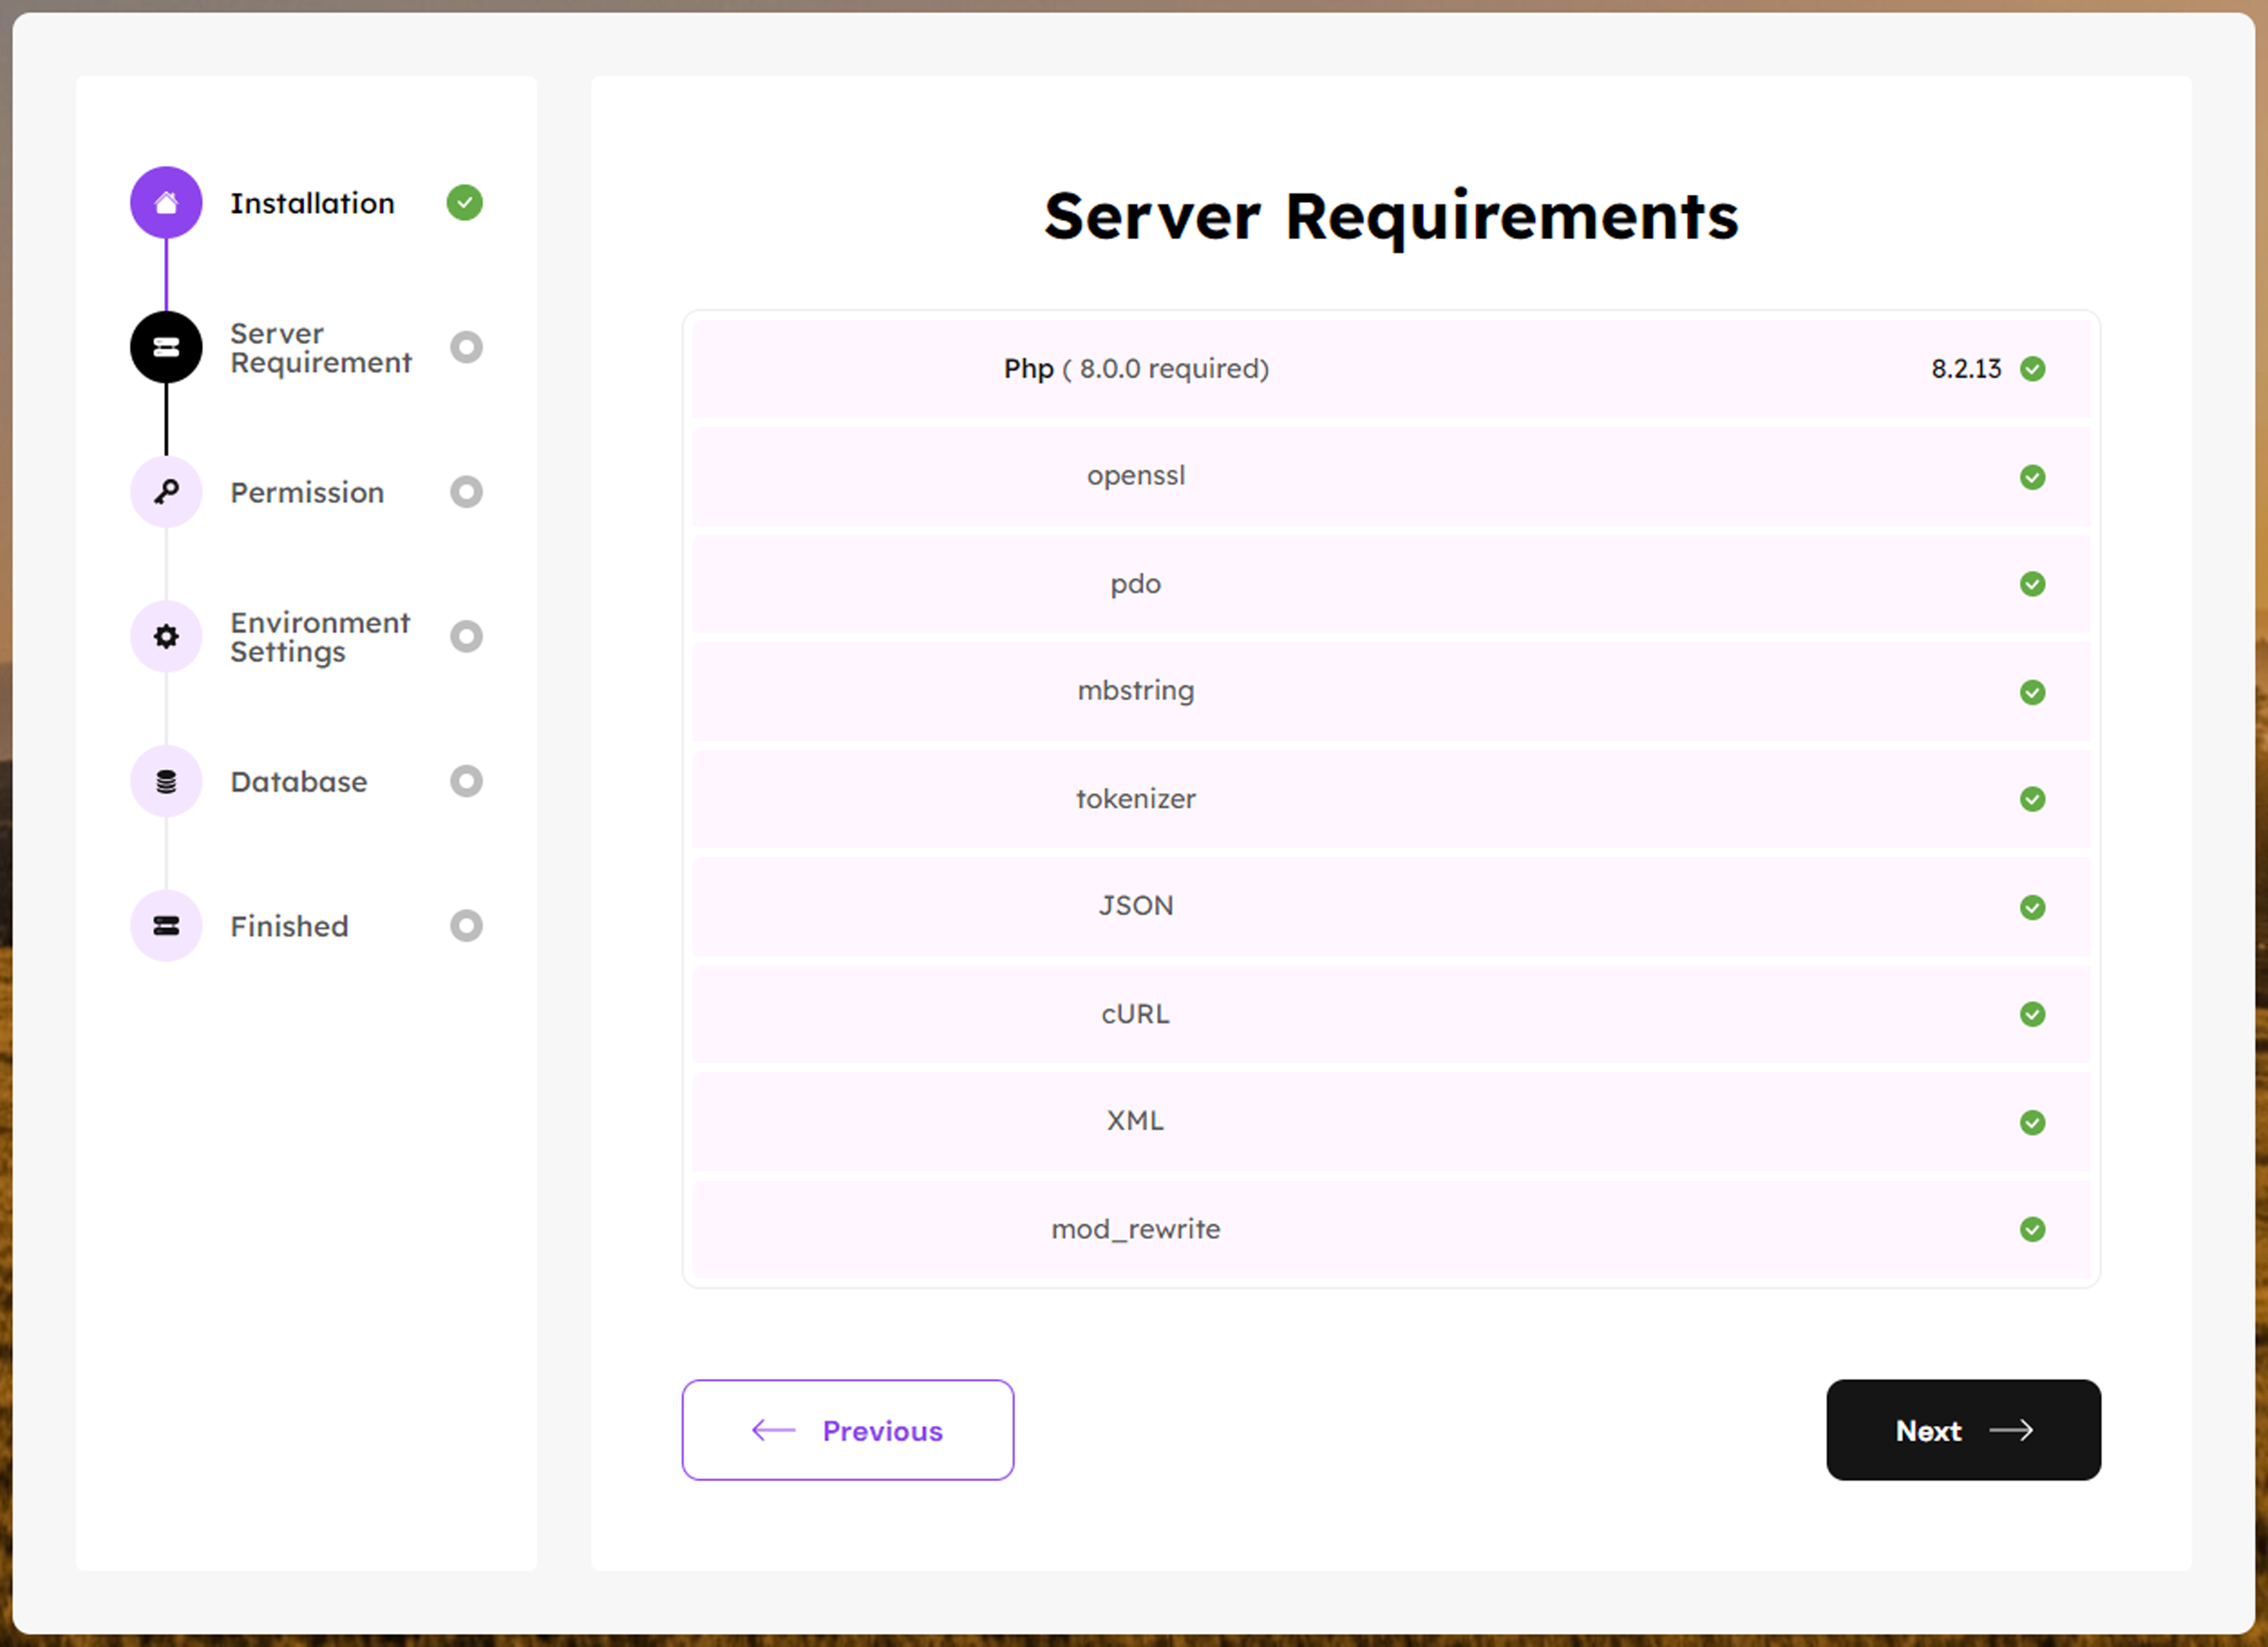
002
Server Requirement check for BidOut Application. If already enable PHP extension, You show checked mark green. And go to next Process. If not enable PHP extension go to php.ini and enable extension.
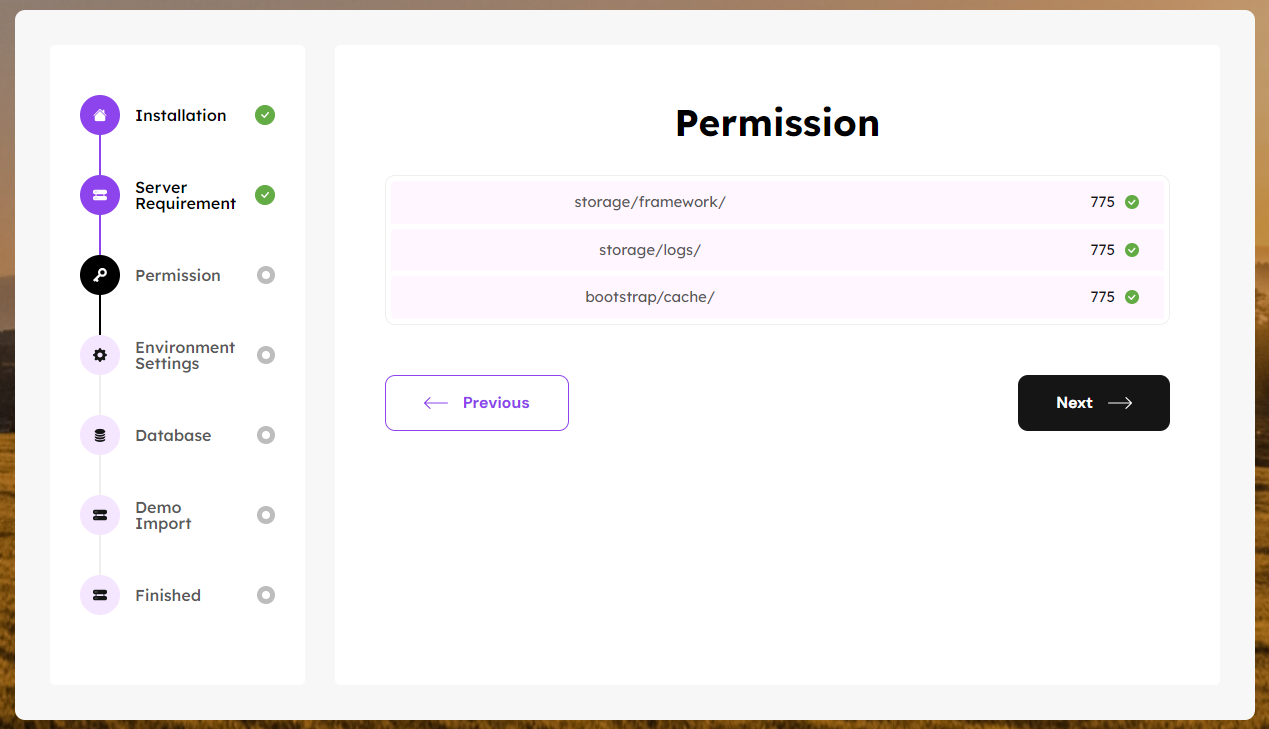
003
Before install need to folder permission Check. If have permission okay, you go next process. And if you forget given folder permission. Go to Folder Permission
004
Environment setting of your application
Note
App debug will be always false for production.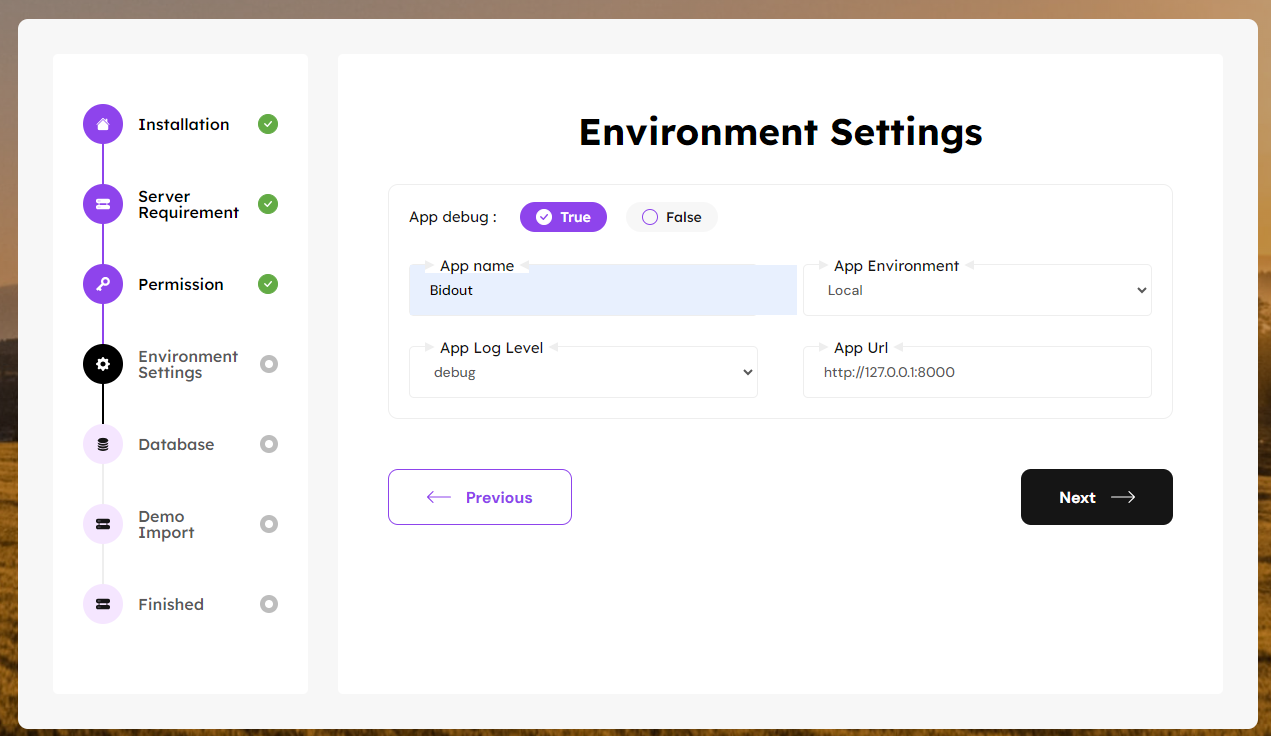
005
Database Connection of your Application. if you forget credential Go to Database Create
Tips
You can connect another cloud server. Database Host
Database Port
Database Name
Database User Name
Database Password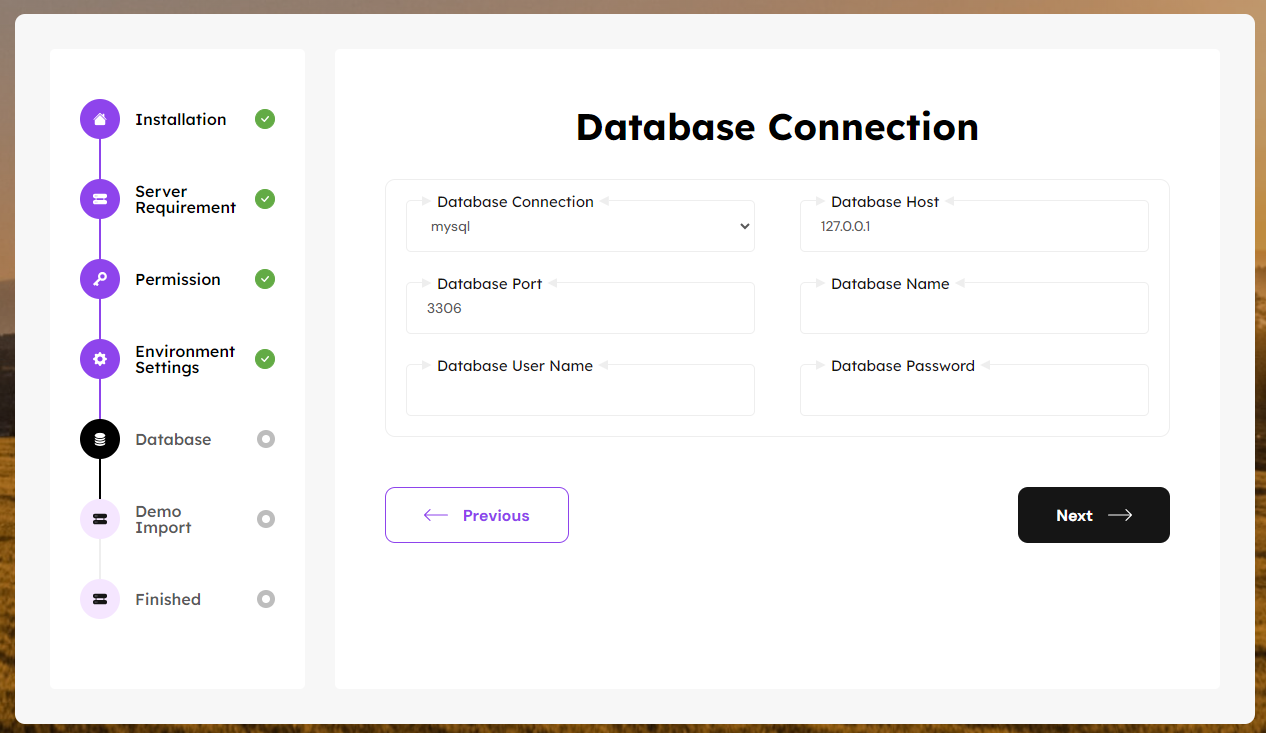
006
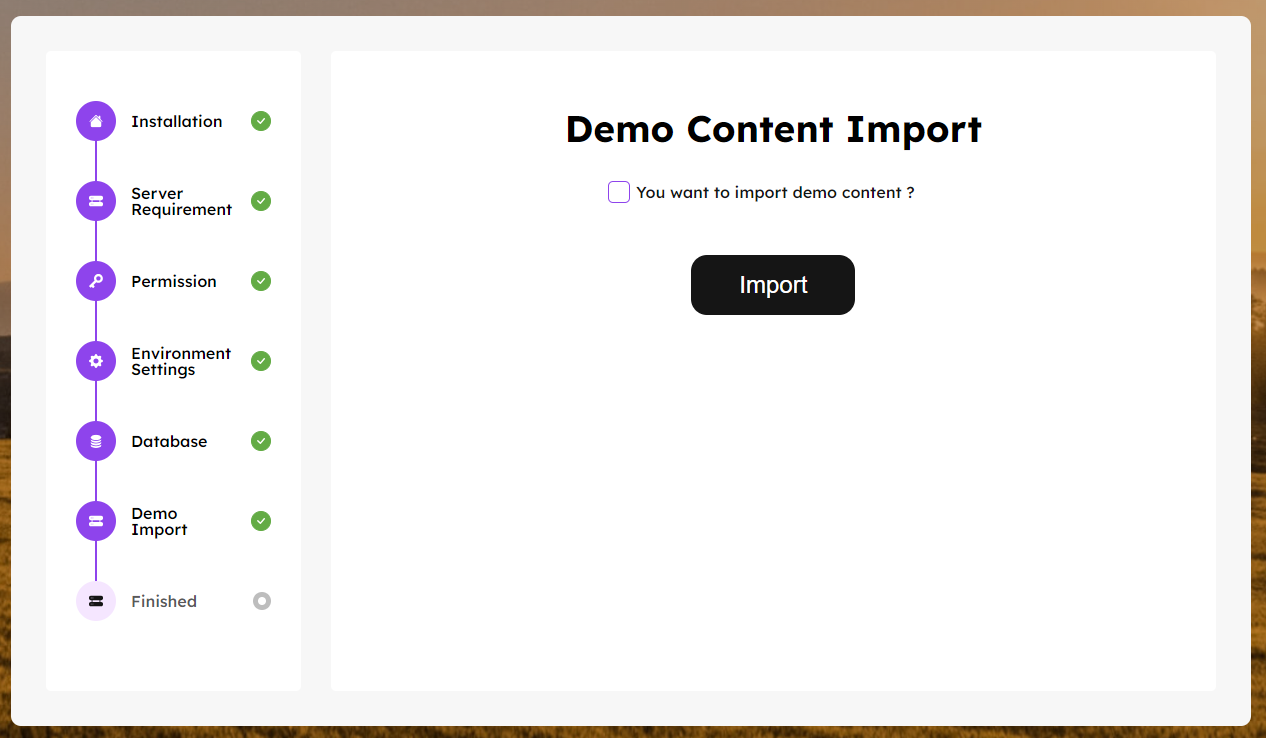
Import the demo content.
007
Finished the processed and see demo credential
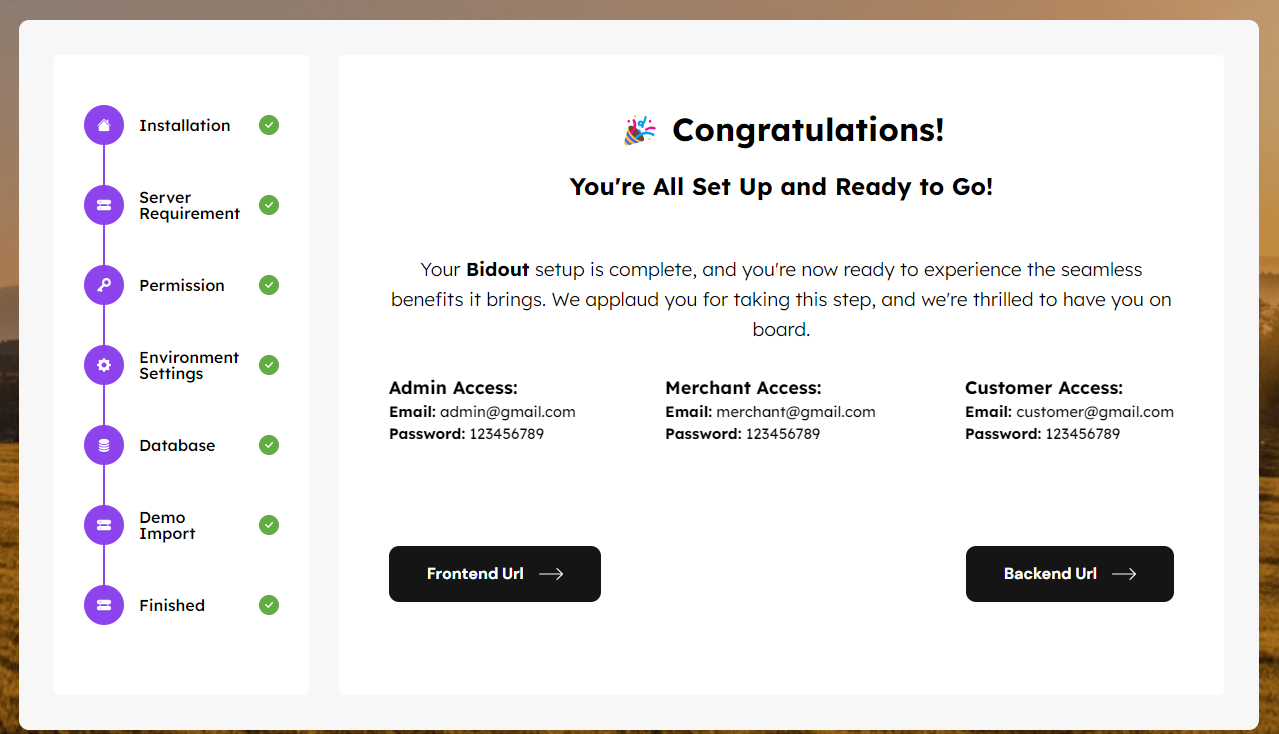
Demo Credential
Admin Accesss
Login Url:(baseUrl)/admin/login
Username: admin@gmail.com
Password: 123456789
Merchant Accesss
Login Url:(baseUrl)/login
Username: merchant@gmail.com
Password: 123456789
Customer Accesss
Login Url:(baseUrl)/login
Username: customer@gmail.com
Password: 123456789